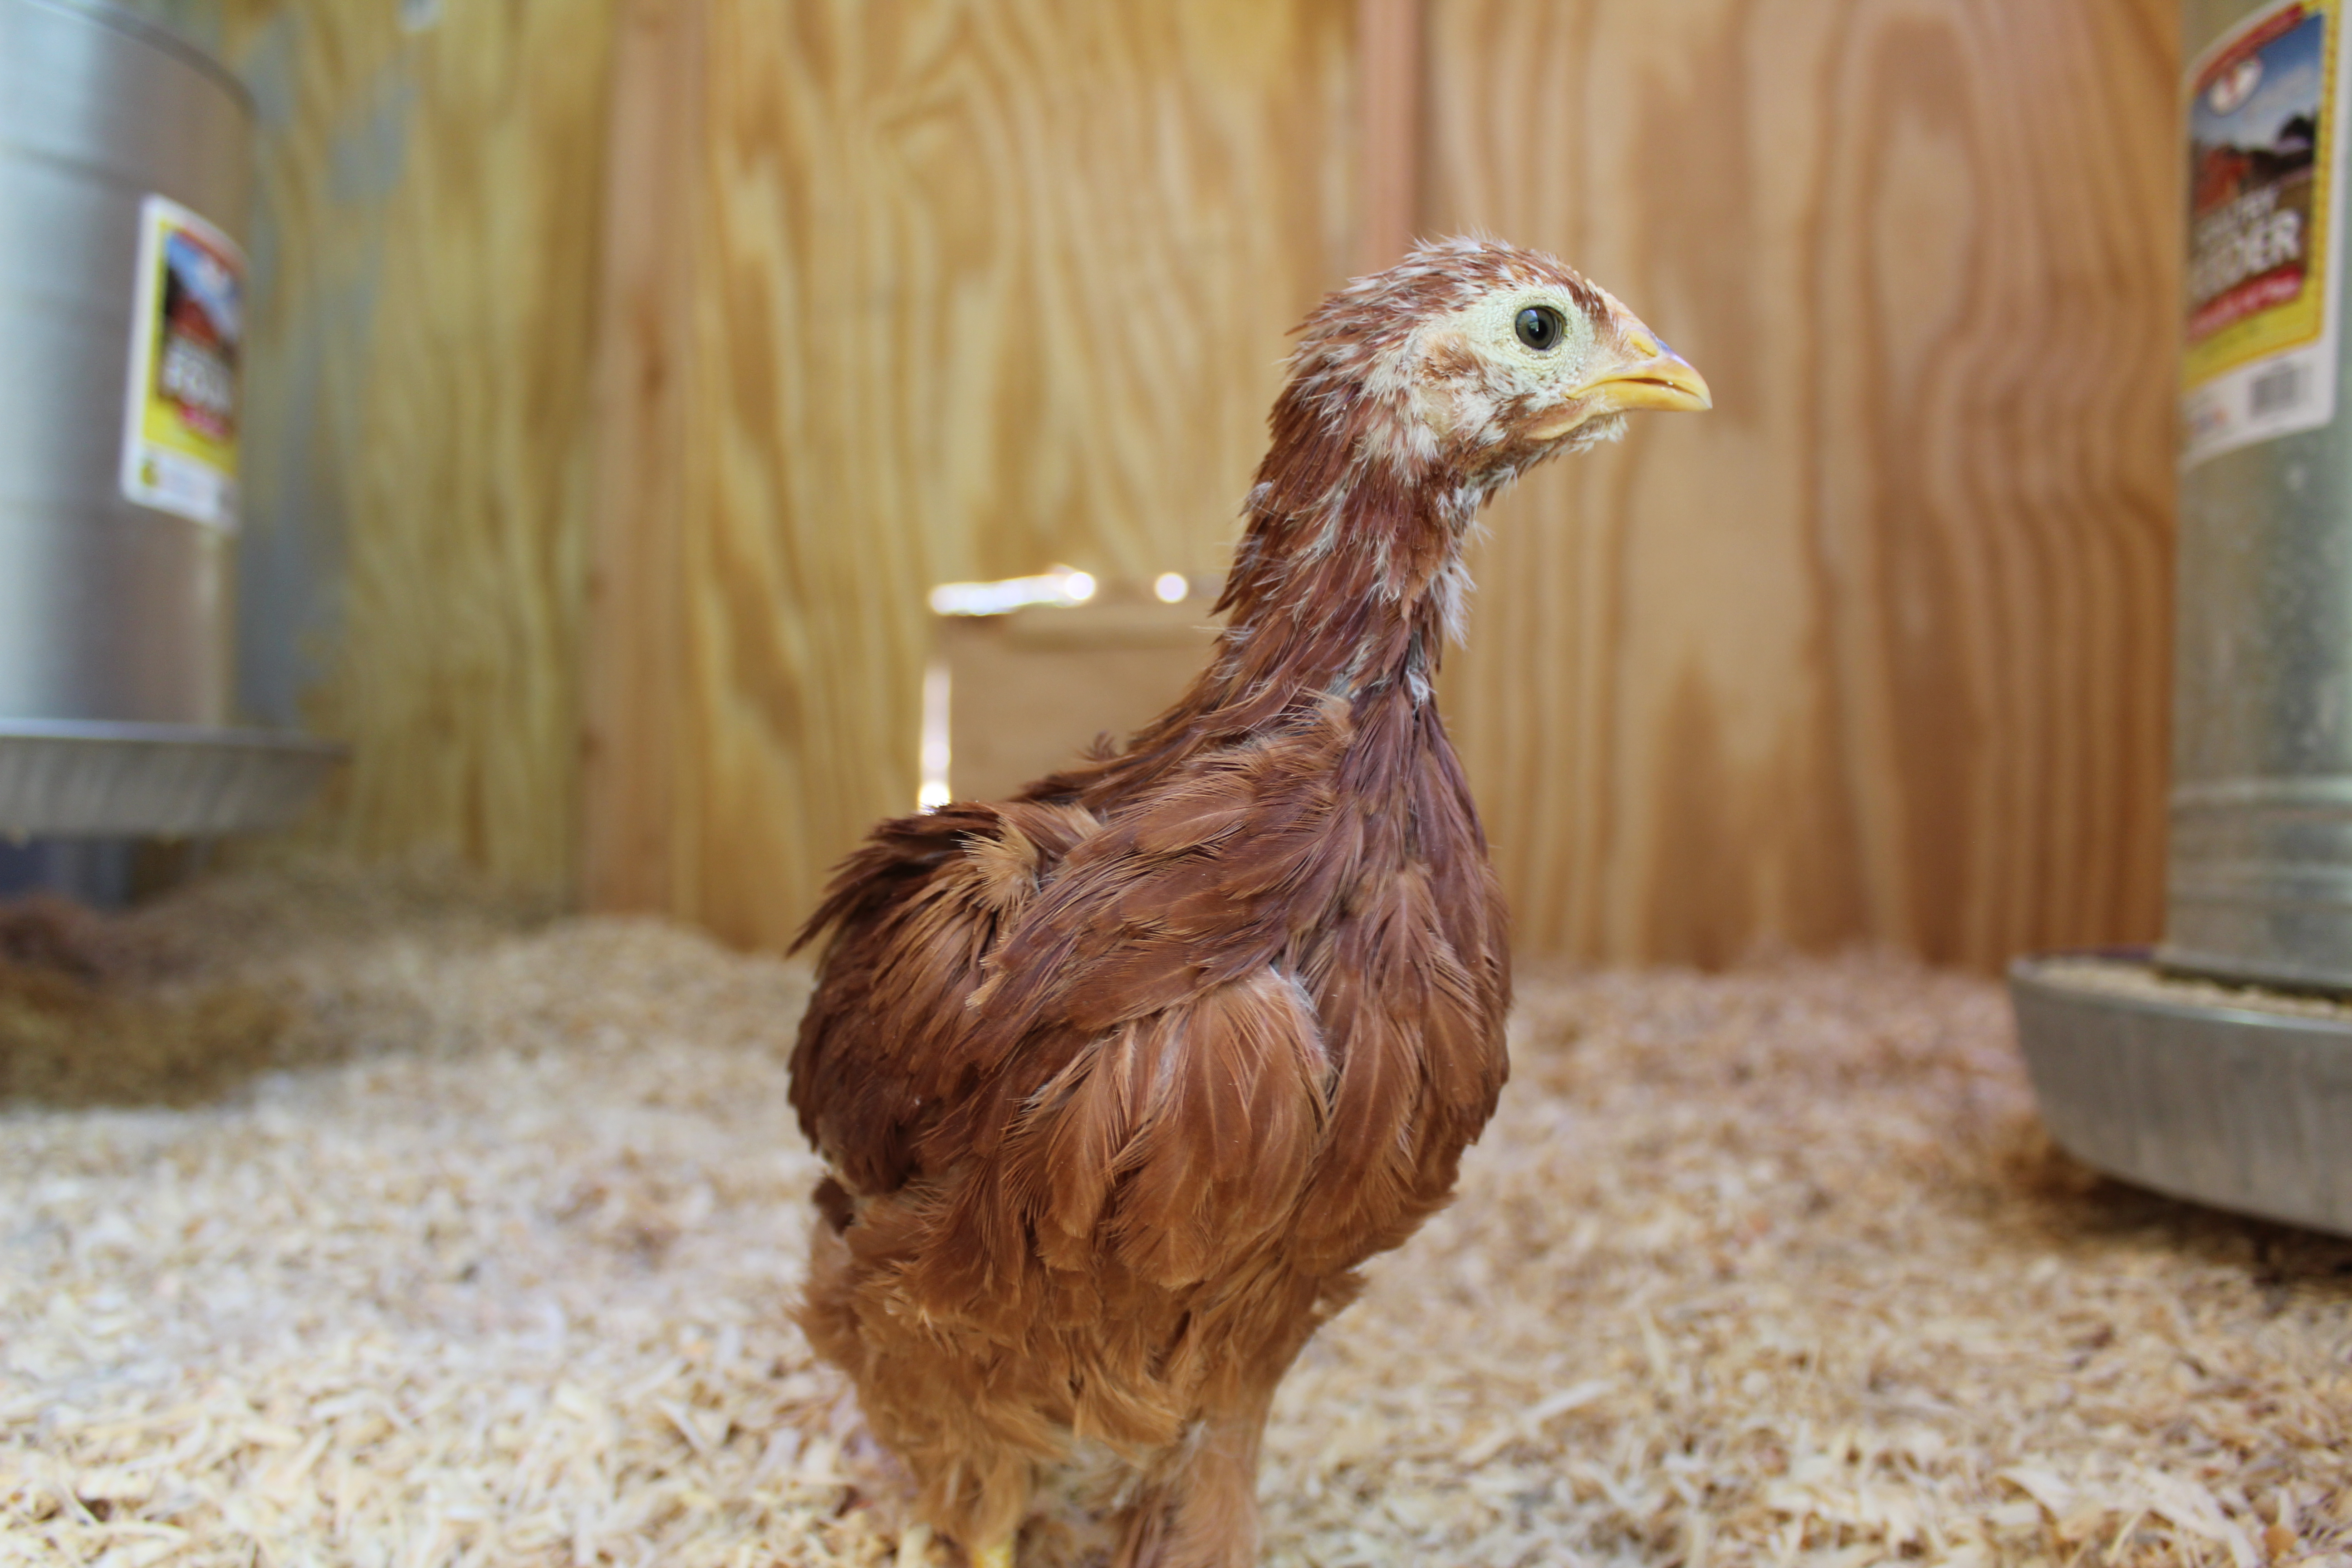
It’s been a while since I’ve updated the world on my chickens. I’m happy to report that all nine are doing well and growing up fast! I’m also happy to report that to date, I think they’re all still girls. There was one that I was a little bit worried about (Legs), but it turns out that she’s just an early bloomer.
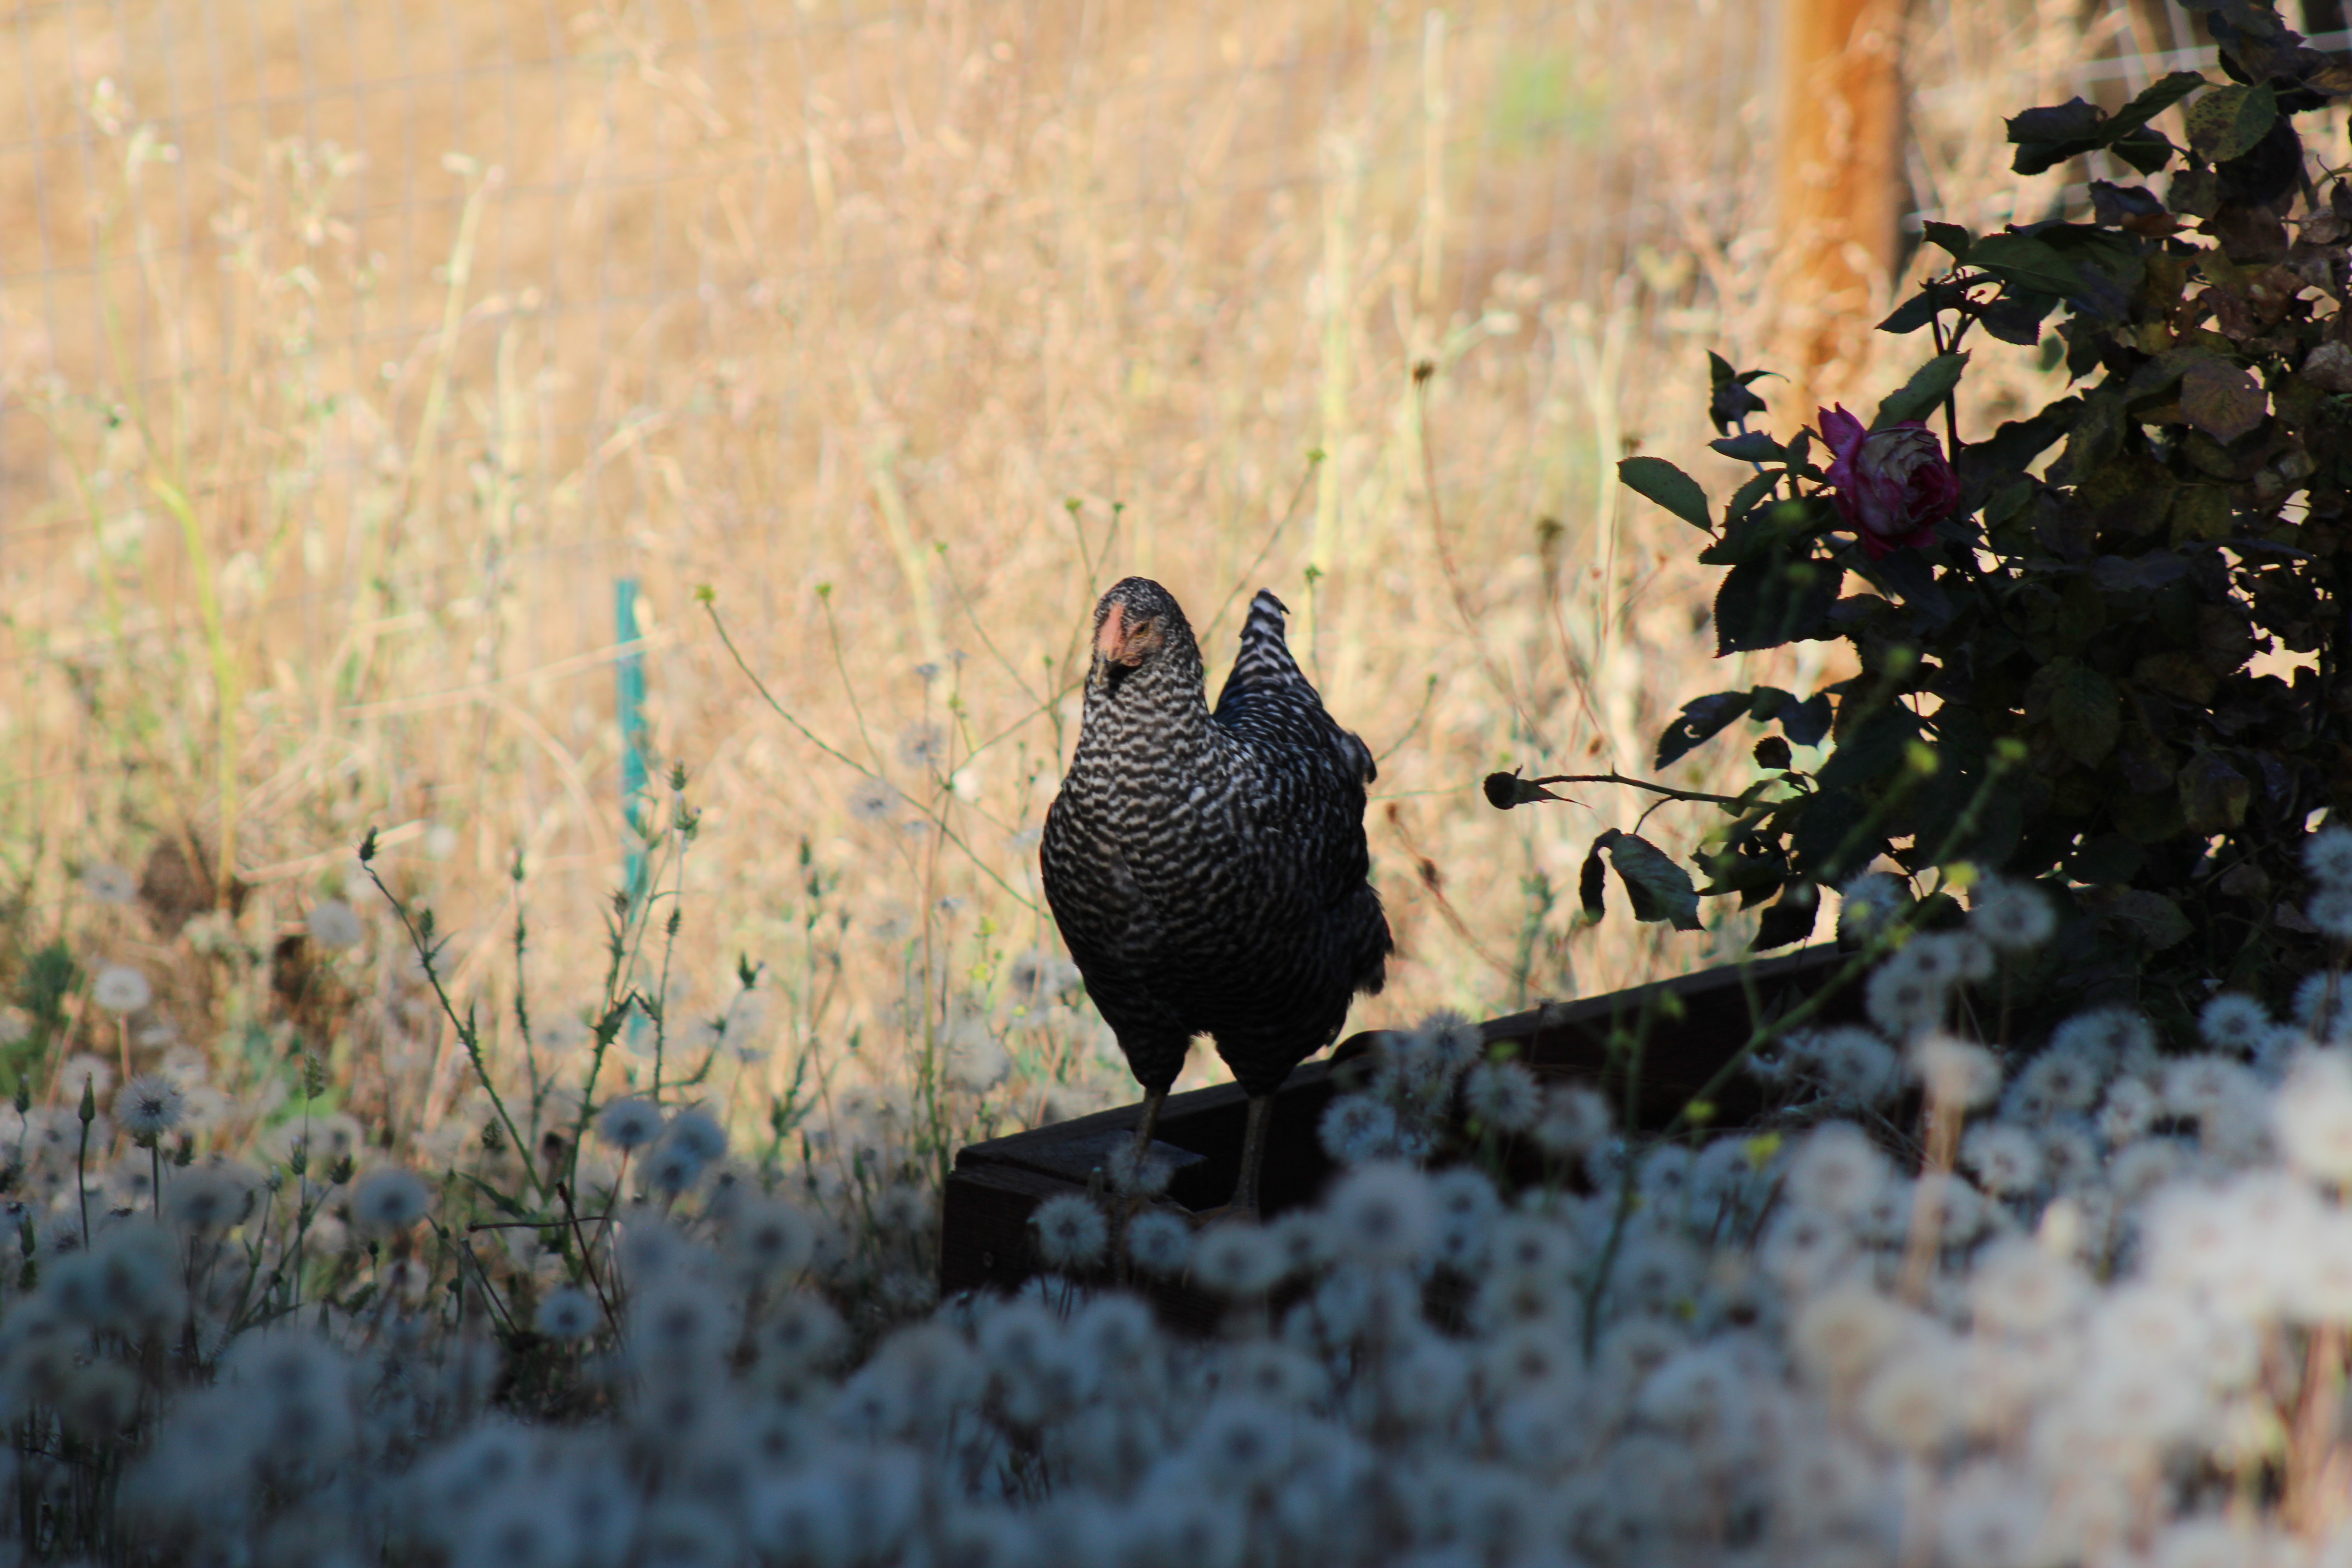
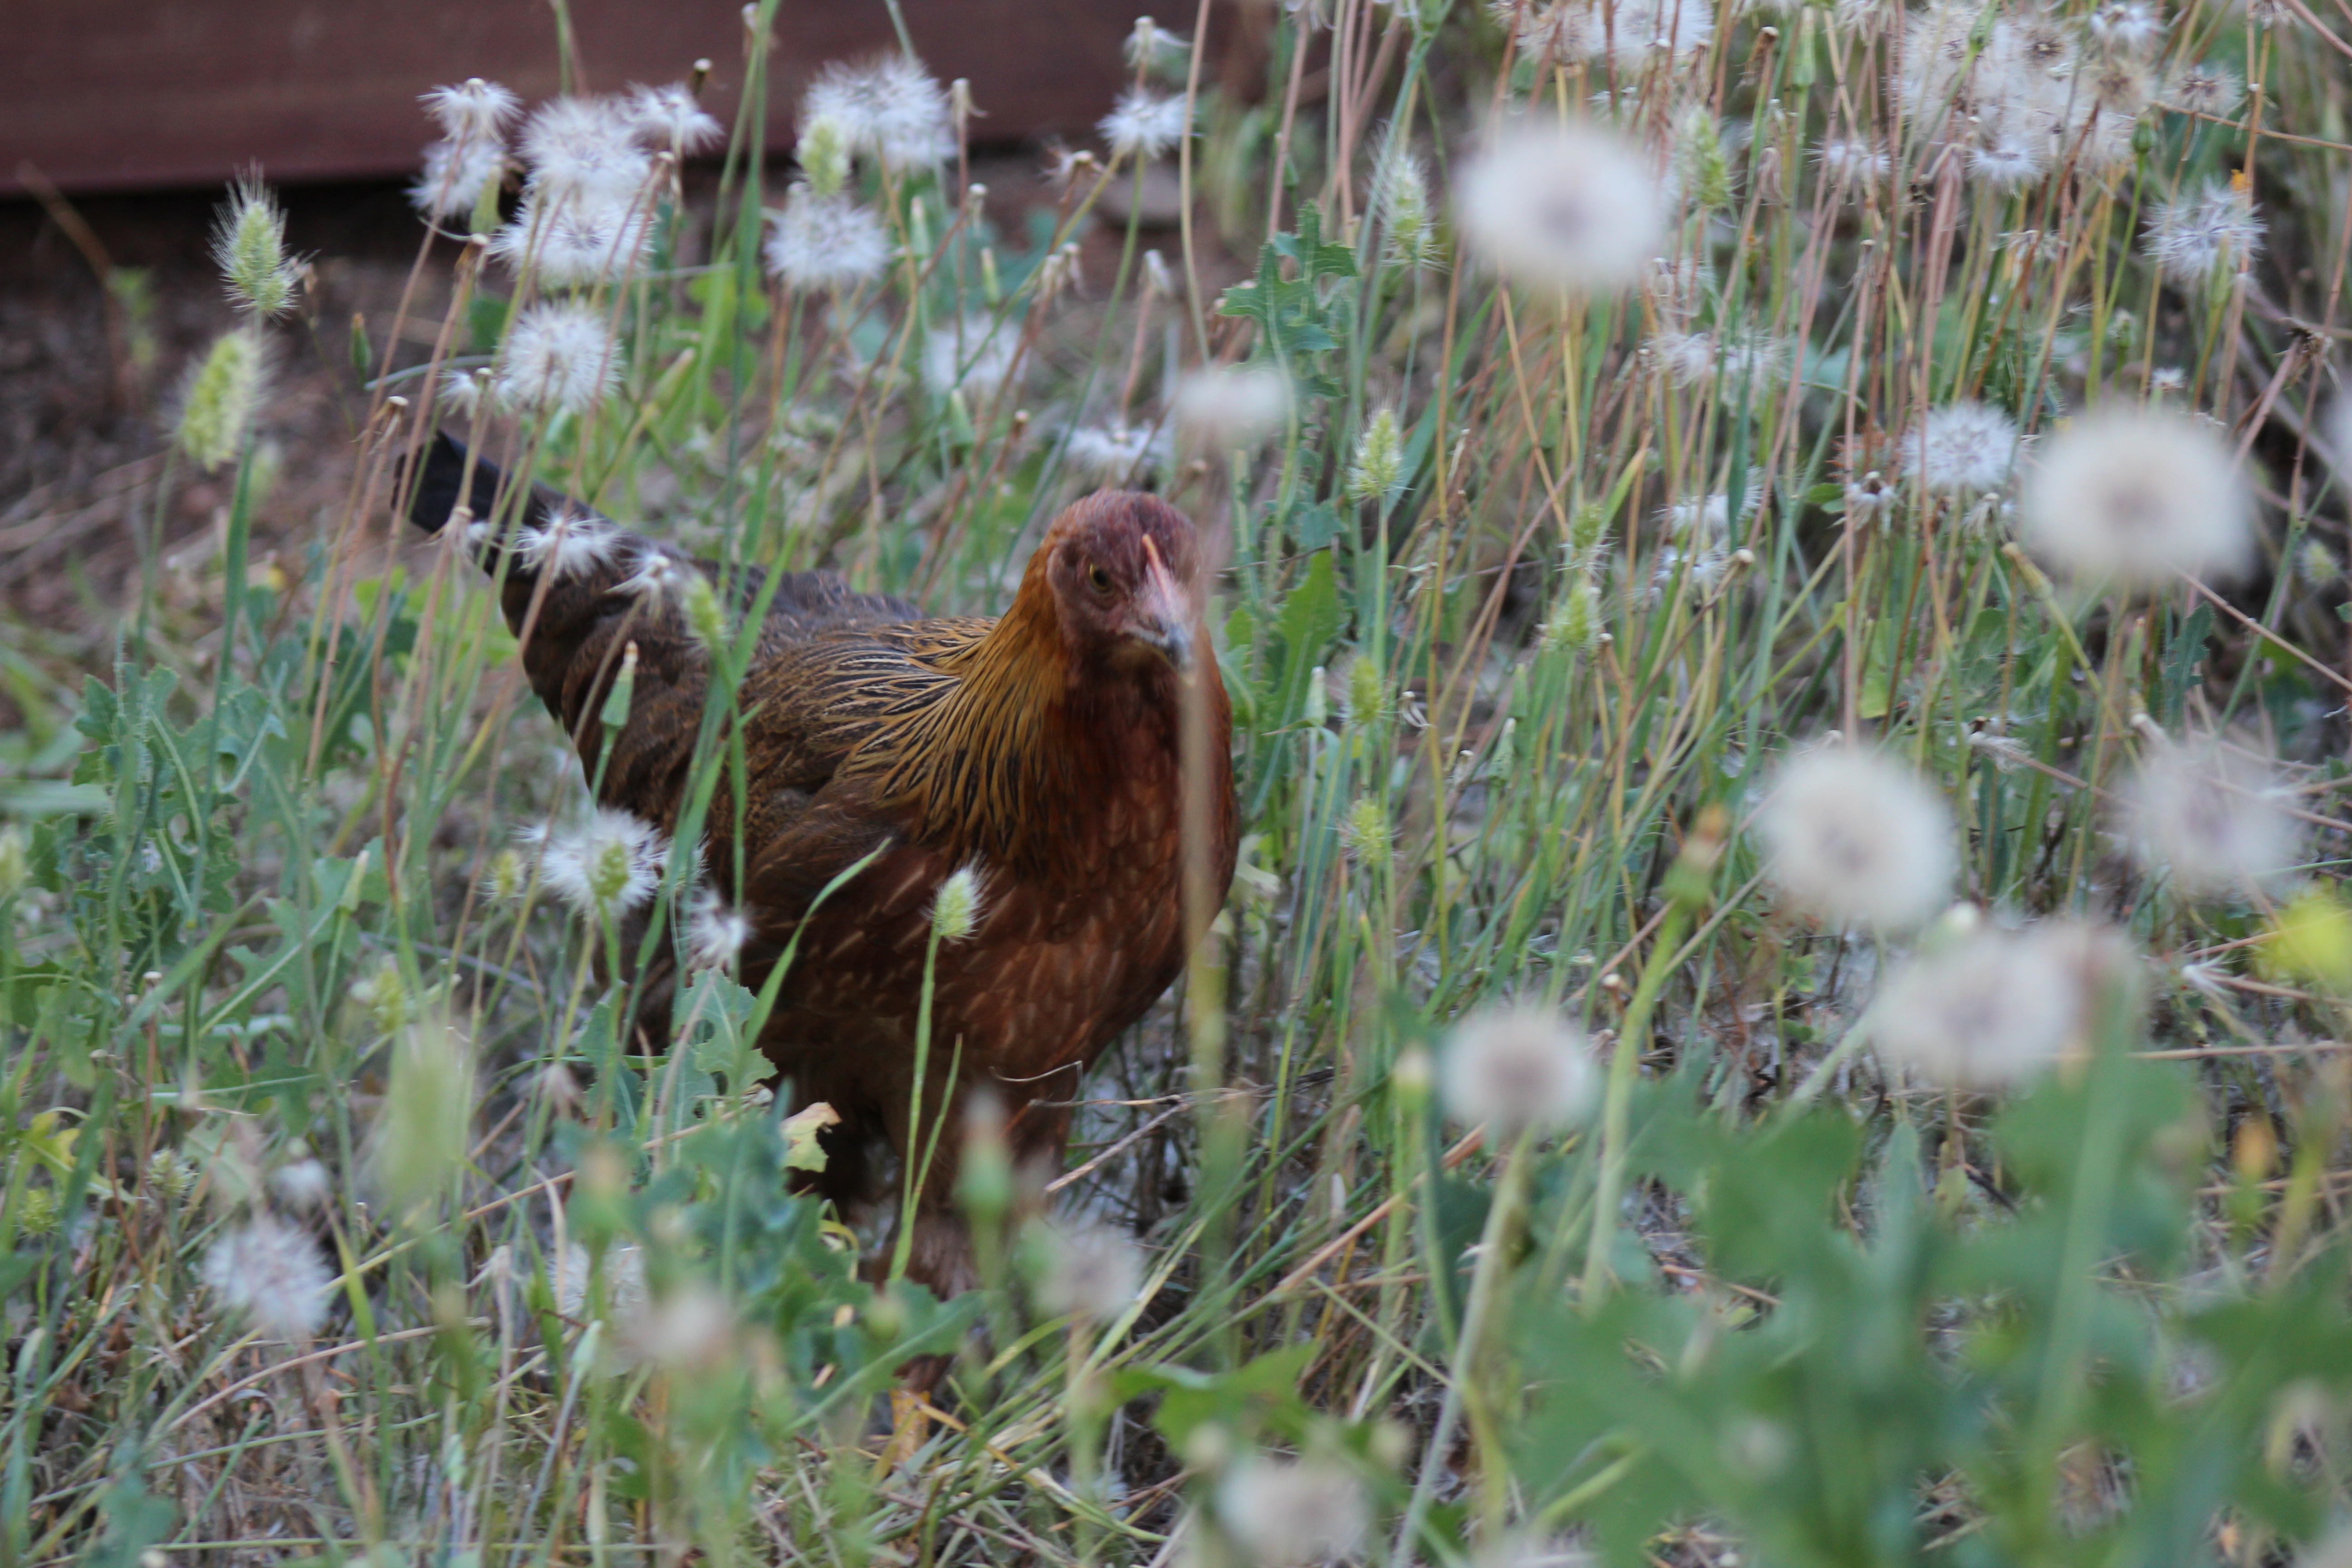
Since I last posted, I made a critical decision… my chickens are going to free range during the day. So, when I open the door in the morning, they’re allowed out of the coop, out of the run, and into the larger orchard. I suppose it’s not complete free ranging since they still have a fence, but there’s probably half an acre for them to run around on. Sometimes they decide to hang out under the coop in the shade, sometimes they go back in. Other times they take dust baths under my rose bushes. I love seeing them run around all day and now they’ve even started approaching me when I take them treats!
I took my camera out to get some “chickens in the wild” pictures the other day… here are the ladies now!
I had it in my head that I would photo document and blog every step of the coop building process and was actually doing pretty well for a while. Then I got tired. And was frantically working on the coop after work and in the morning, and any other spare minute I had. Lesson learned: build the coop before you buy the chickens. Those little suckers grow fast!
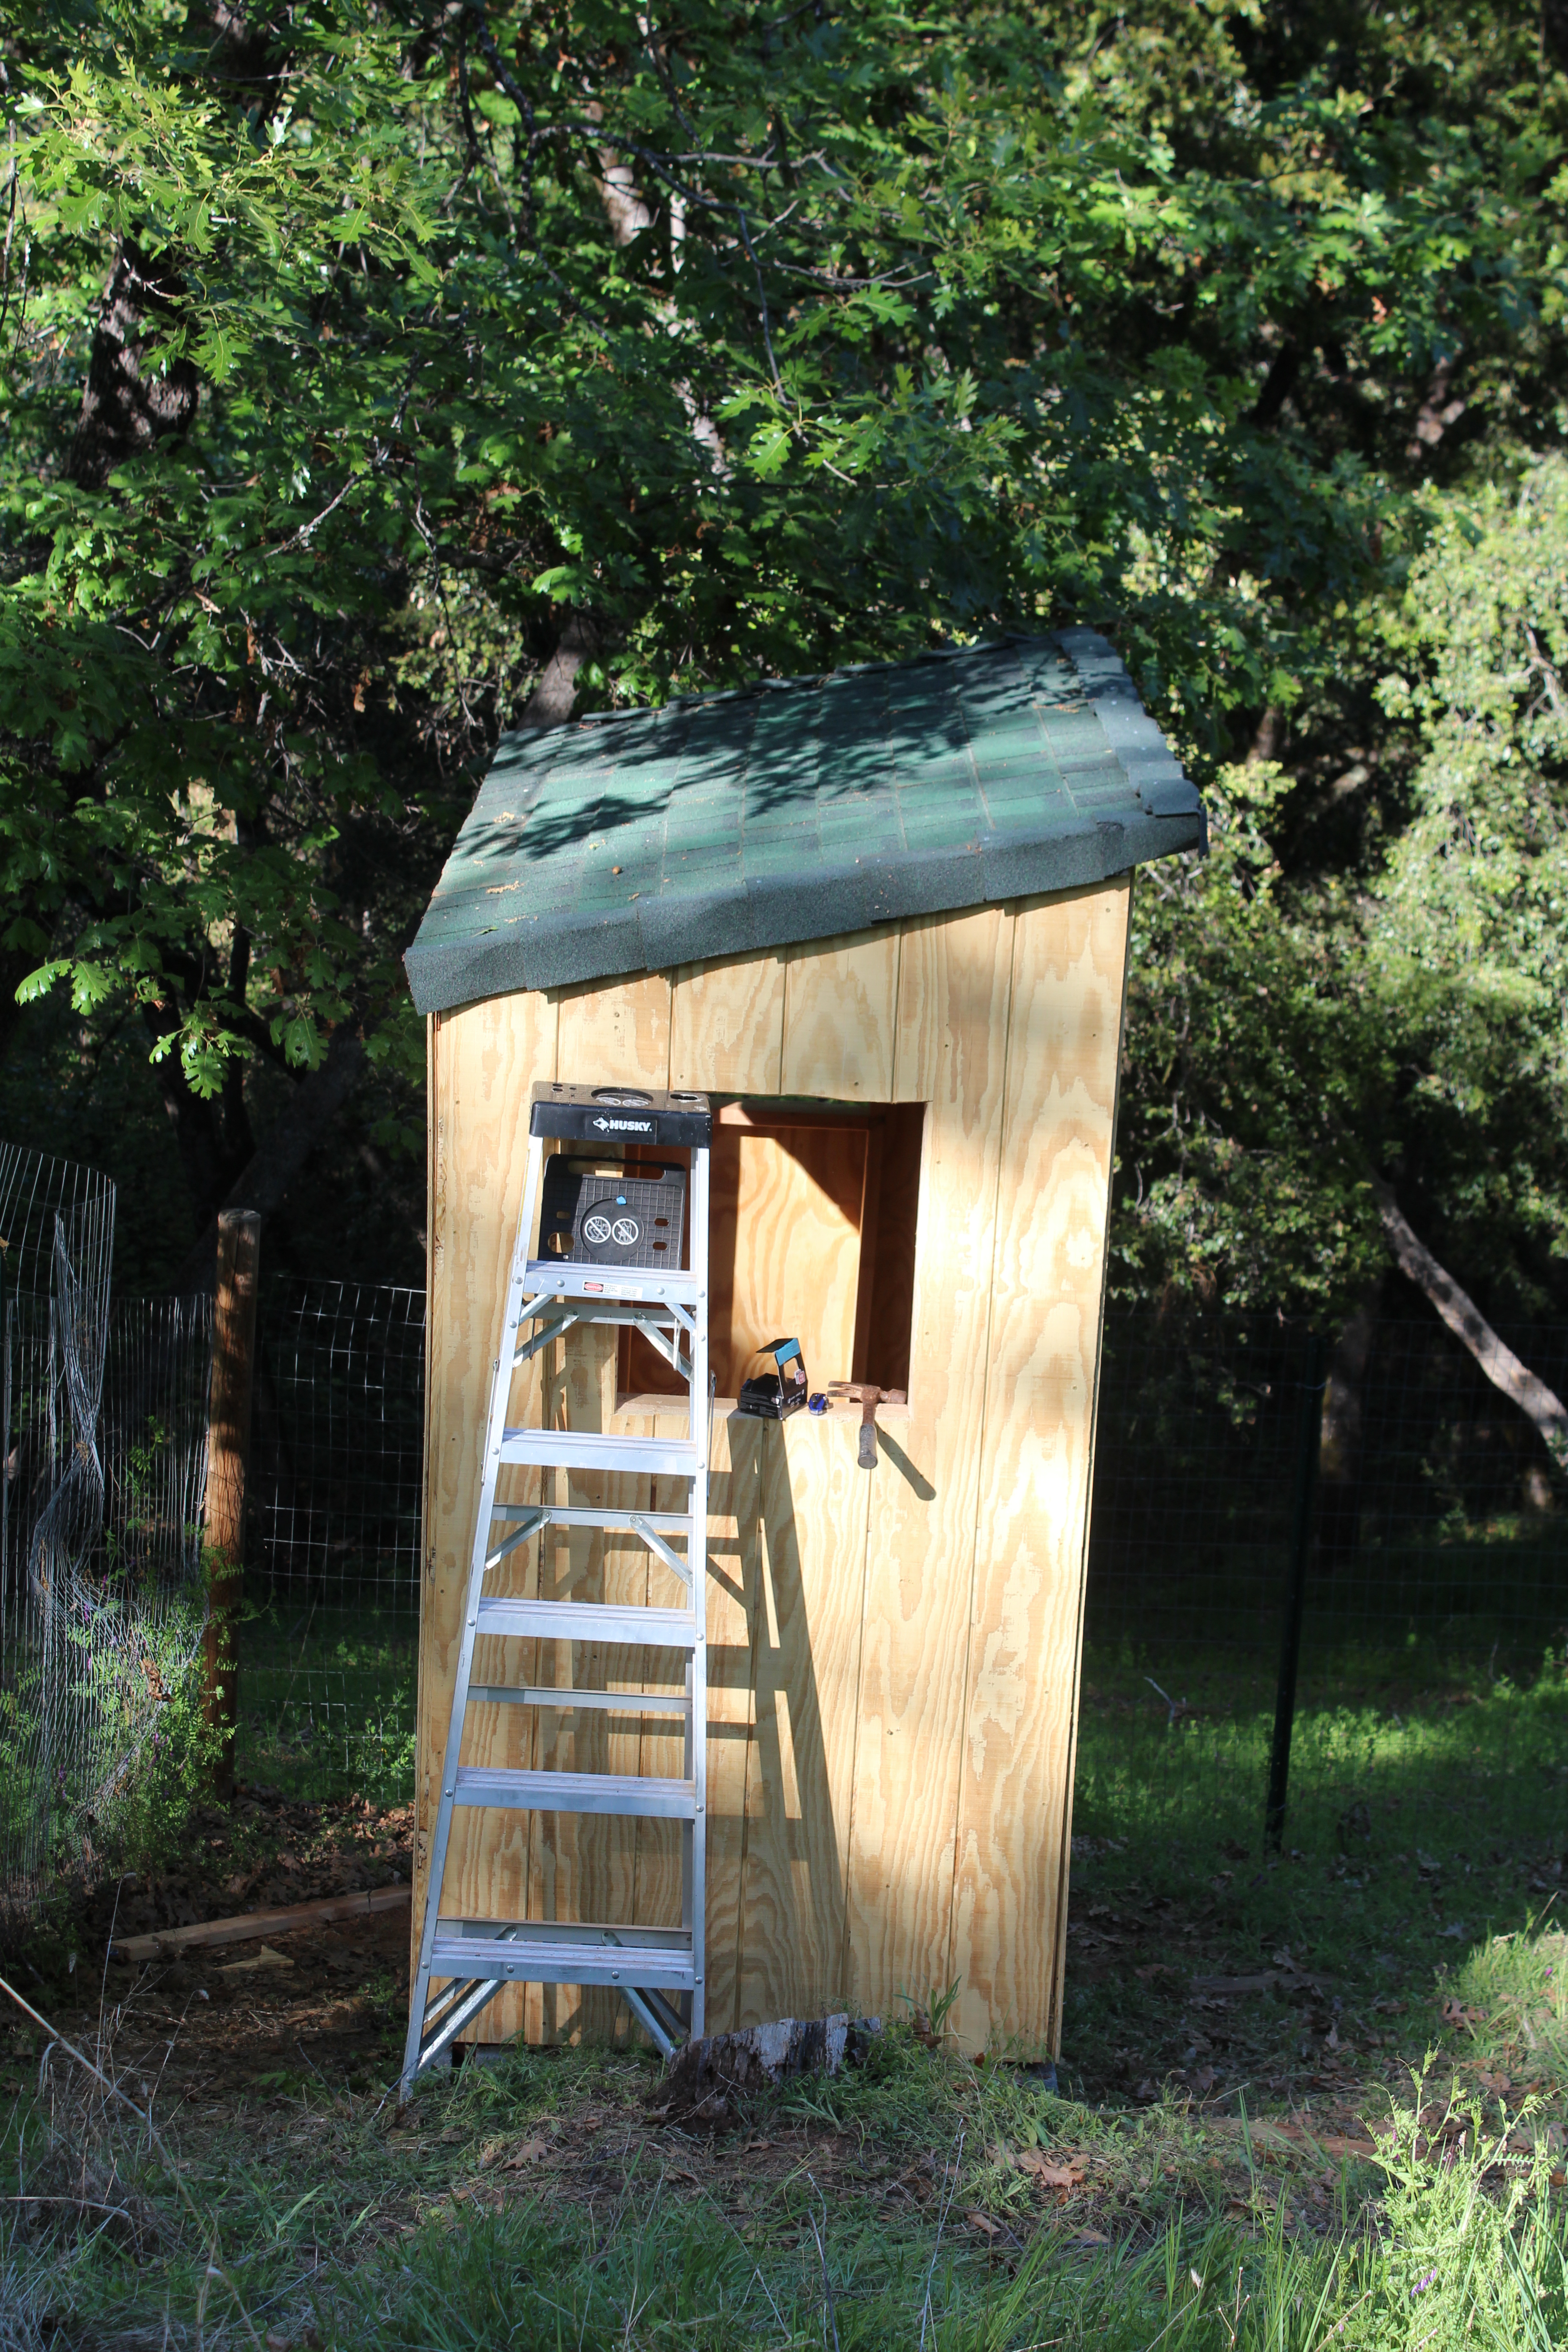
That said, today I finished the coop and moved the girls in! I still have some touching up I want to do on the trim (where the screws are, etc), but it’s good enough to live in!
Side View of the CoopPeople Door Side
I will be adding some stairs so that it’s easier to get in and out of the coop.
Chicken Door SideRoost, Nest Box, & Floor
Inside I put a roost and took a tip from a lot of folks online and used linoleum floor. It helps with cleanup and I scored a remnants roll for only $13!
I hand carried Stretch down and she got to be the first chick to be in the coop. Because she’s my favorite.
Stretch Checking Out Her New HomeThe Ladies Settling In
Next up: the run. I bought the lumber for it today and will get to work on it tomorrow after work. I have some time… the chicks have to stay inside the coop for a week or so… that’s how they learn it’s home and “come home to roost” each night.
Things have definitely been moving along with the coop and with the chicks. Over the past few days I’ve been working hard on the coop, but my hubby has been working extra hard!
Walls With Roof Beams
After that, it was time to put the siding on. We were super tired because we had the Garth Brooks concert the night before (stay tuned for that post), and it seemed to take forever to get just two walls up. Mike was driving home the next day and remembered his trick for putting siding up alone (leveled nails across the bottom) and had the other two walls up before I got home.
Two Sides
Then, he got bored while I was at work today, and poof! we have a roof! It’s the same color as the roof on our house and pump shed… I’ll be painting the coop the same wall and trim color as well!
Roof!
I did my part today and built the nest box when I got home from work. I still need to cut the hole for it (it will go just under the window you see in the roof picture above) and screw it in, but it’s set!
Nest Box
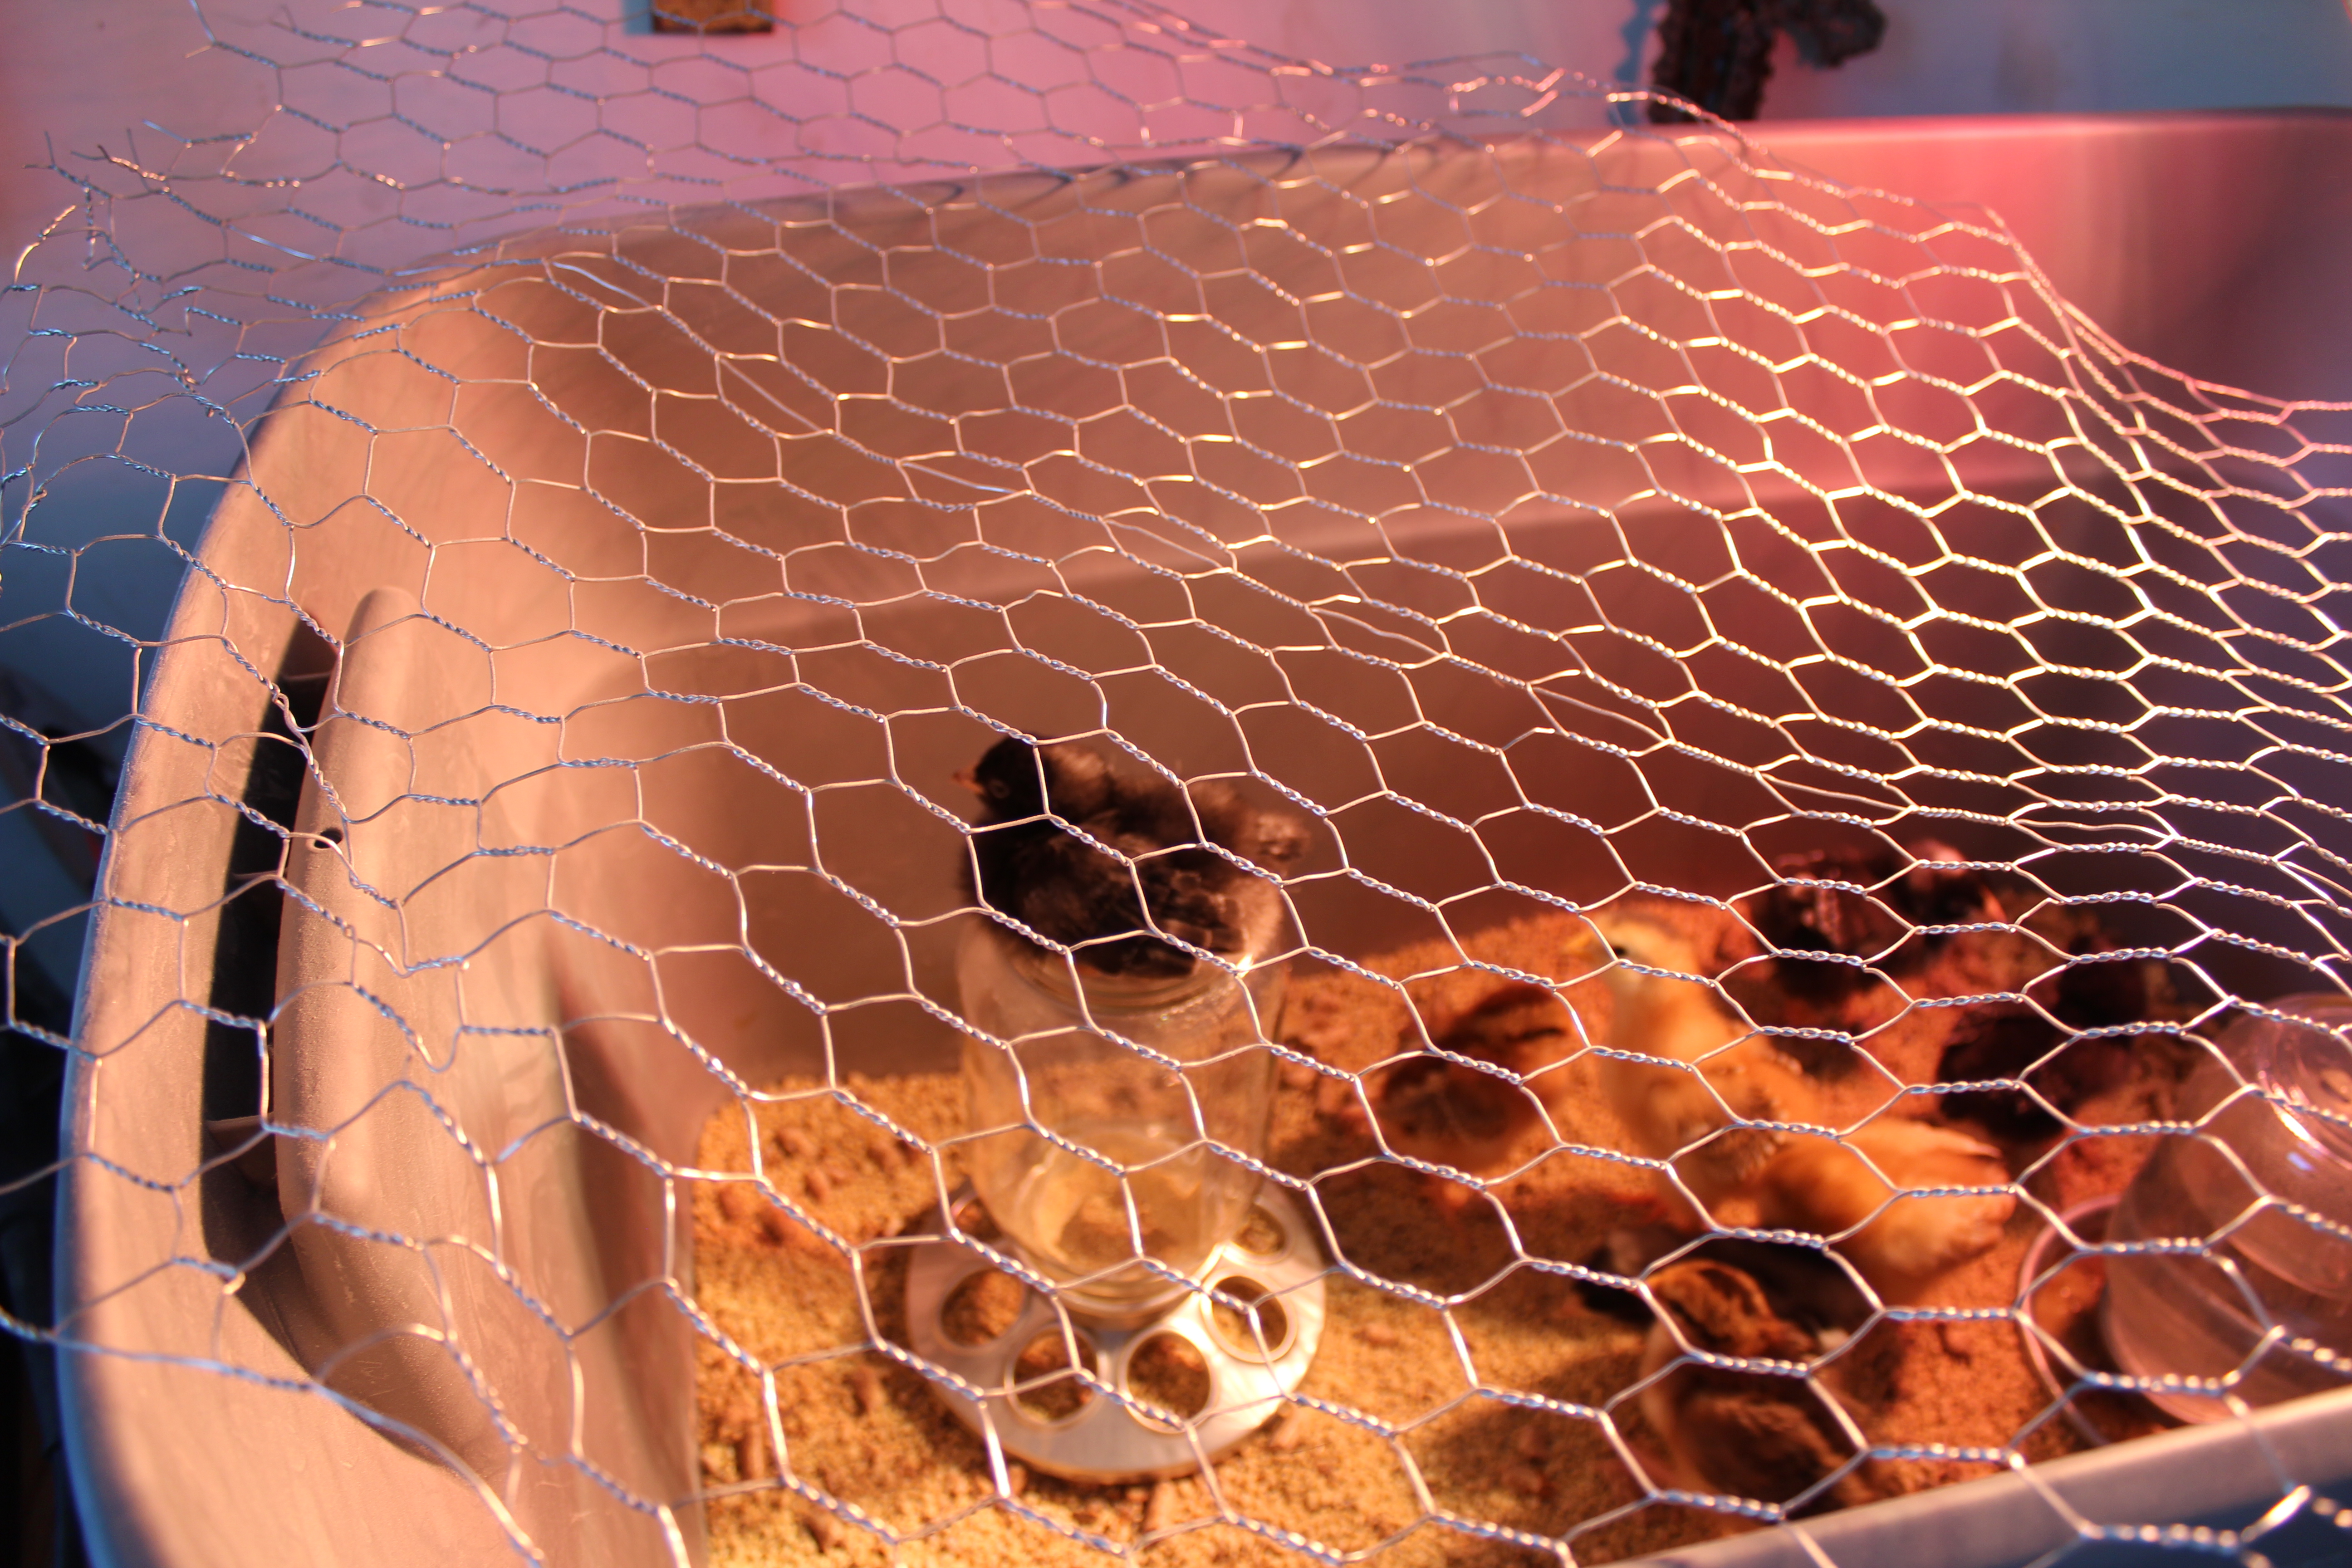
Tonight the ladies got a new little home… for now at least. They were starting to outgrow their little tub… they were always stepping all over each other and squawking. So, I decided to make use of my childhood fort building skills and create this architectural wonder that rivals the Egyptian pyramids:
The New Hangout
Ok, it’s ugly. But it gets the job done and the chicks are already loving it. The first thing they did when I put them in was to run around and flap their wings.
Tomorrow will be the final “meet the girls” post with the last four chicks. I can’t believe how fast they’re growing!
Today was wall day… Mike and I headed down to the orchard with my walls strapped to the back of the truck. They went up pretty easily. Well, with one confession… we did put that front wall on backwards at first. But it was quick and easy enough to fix! I am blown away… it’s like a real structure now! Solid and everything lined up… I can’t believe it! Not bad for someone who has never built something in her life!
Today was day two of the chicken coop project… as the sun set I had one very smashed finger, two bruised knees, four strong walls, and a borrowed screw gun. My neighbor (who is a contractor) intervened when he heard me hammering angrily… mentioning that I might “have more fun” if I borrowed his screw gun. The man is an angel… it was definitely easier!
Today’s goal was to get the walls finished. The first wall I tackled was the hardest… the wall that would have the door for the people to get in and out of. There was just a lot of measuring and cutting.
The People Door Wall
The next walls I tackled were the two side walls. Each of these will have a window, complete with shutters to keep the elements out. I’ve decided that I won’t be putting a glass window in… just screening it with hardware cloth and then adding functional shutters. Much of my chicken research has said that ventilation in coops is notoriously bad… people are so worried about their girls getting cold that they don’t provide a healthy respiratory environment. So, I’m counting on those feathers to do what they’re designed to do and I’ll use the shutters to keep the rain out.
The Side Walls
And, the chicken door wall. This one is the one I’m most proud of. It looks deceivingly simple… but for someone with zero experience building things, I think I did a pretty good job. I had to Youtube how to cut at the 15 degree angle, but I got it! This will be connected to the run and will have the door the chickens will use to get in and out of the coop.
The Wall With The Chicken DoorThe Angle
That little lip is intentional… since the roof is designed to slope towards the chicken door, I’m going to put a little gutter on and get it to drain into a barrel… that way we’ll have reclaimed water for the garden!
Finally, the finger. I got frustrated with the screws (pre-neighbor intervention) and started using nails… was doing a great job (hammering hard) when the nail wobbled and I smacked my finger. I hate to say it, but I said some choice words that are not appropriate for use on Sundays. I dripped blood around the garage (now muttering those choice words because my finger went numb) and then went inside to wash it out. I slapped a band aid on and headed back out to dominate the nail. True hardcore carpenter style. I think I’m gonna make it through the night, but wouldn’t be surprised if I developed one of those really cool black finger nails.
Workman’s Comp?
Next up… we attach the walls and get to work on the roof! I can’t wait for it to look like a real structure!
Today I started on my chicken coop. My husband was super cute… he came down “to make sure I got started and show me tips and tricks”. I think he wanted to help a bit… he ended up spending the afternoon with me. It was nice to work together!
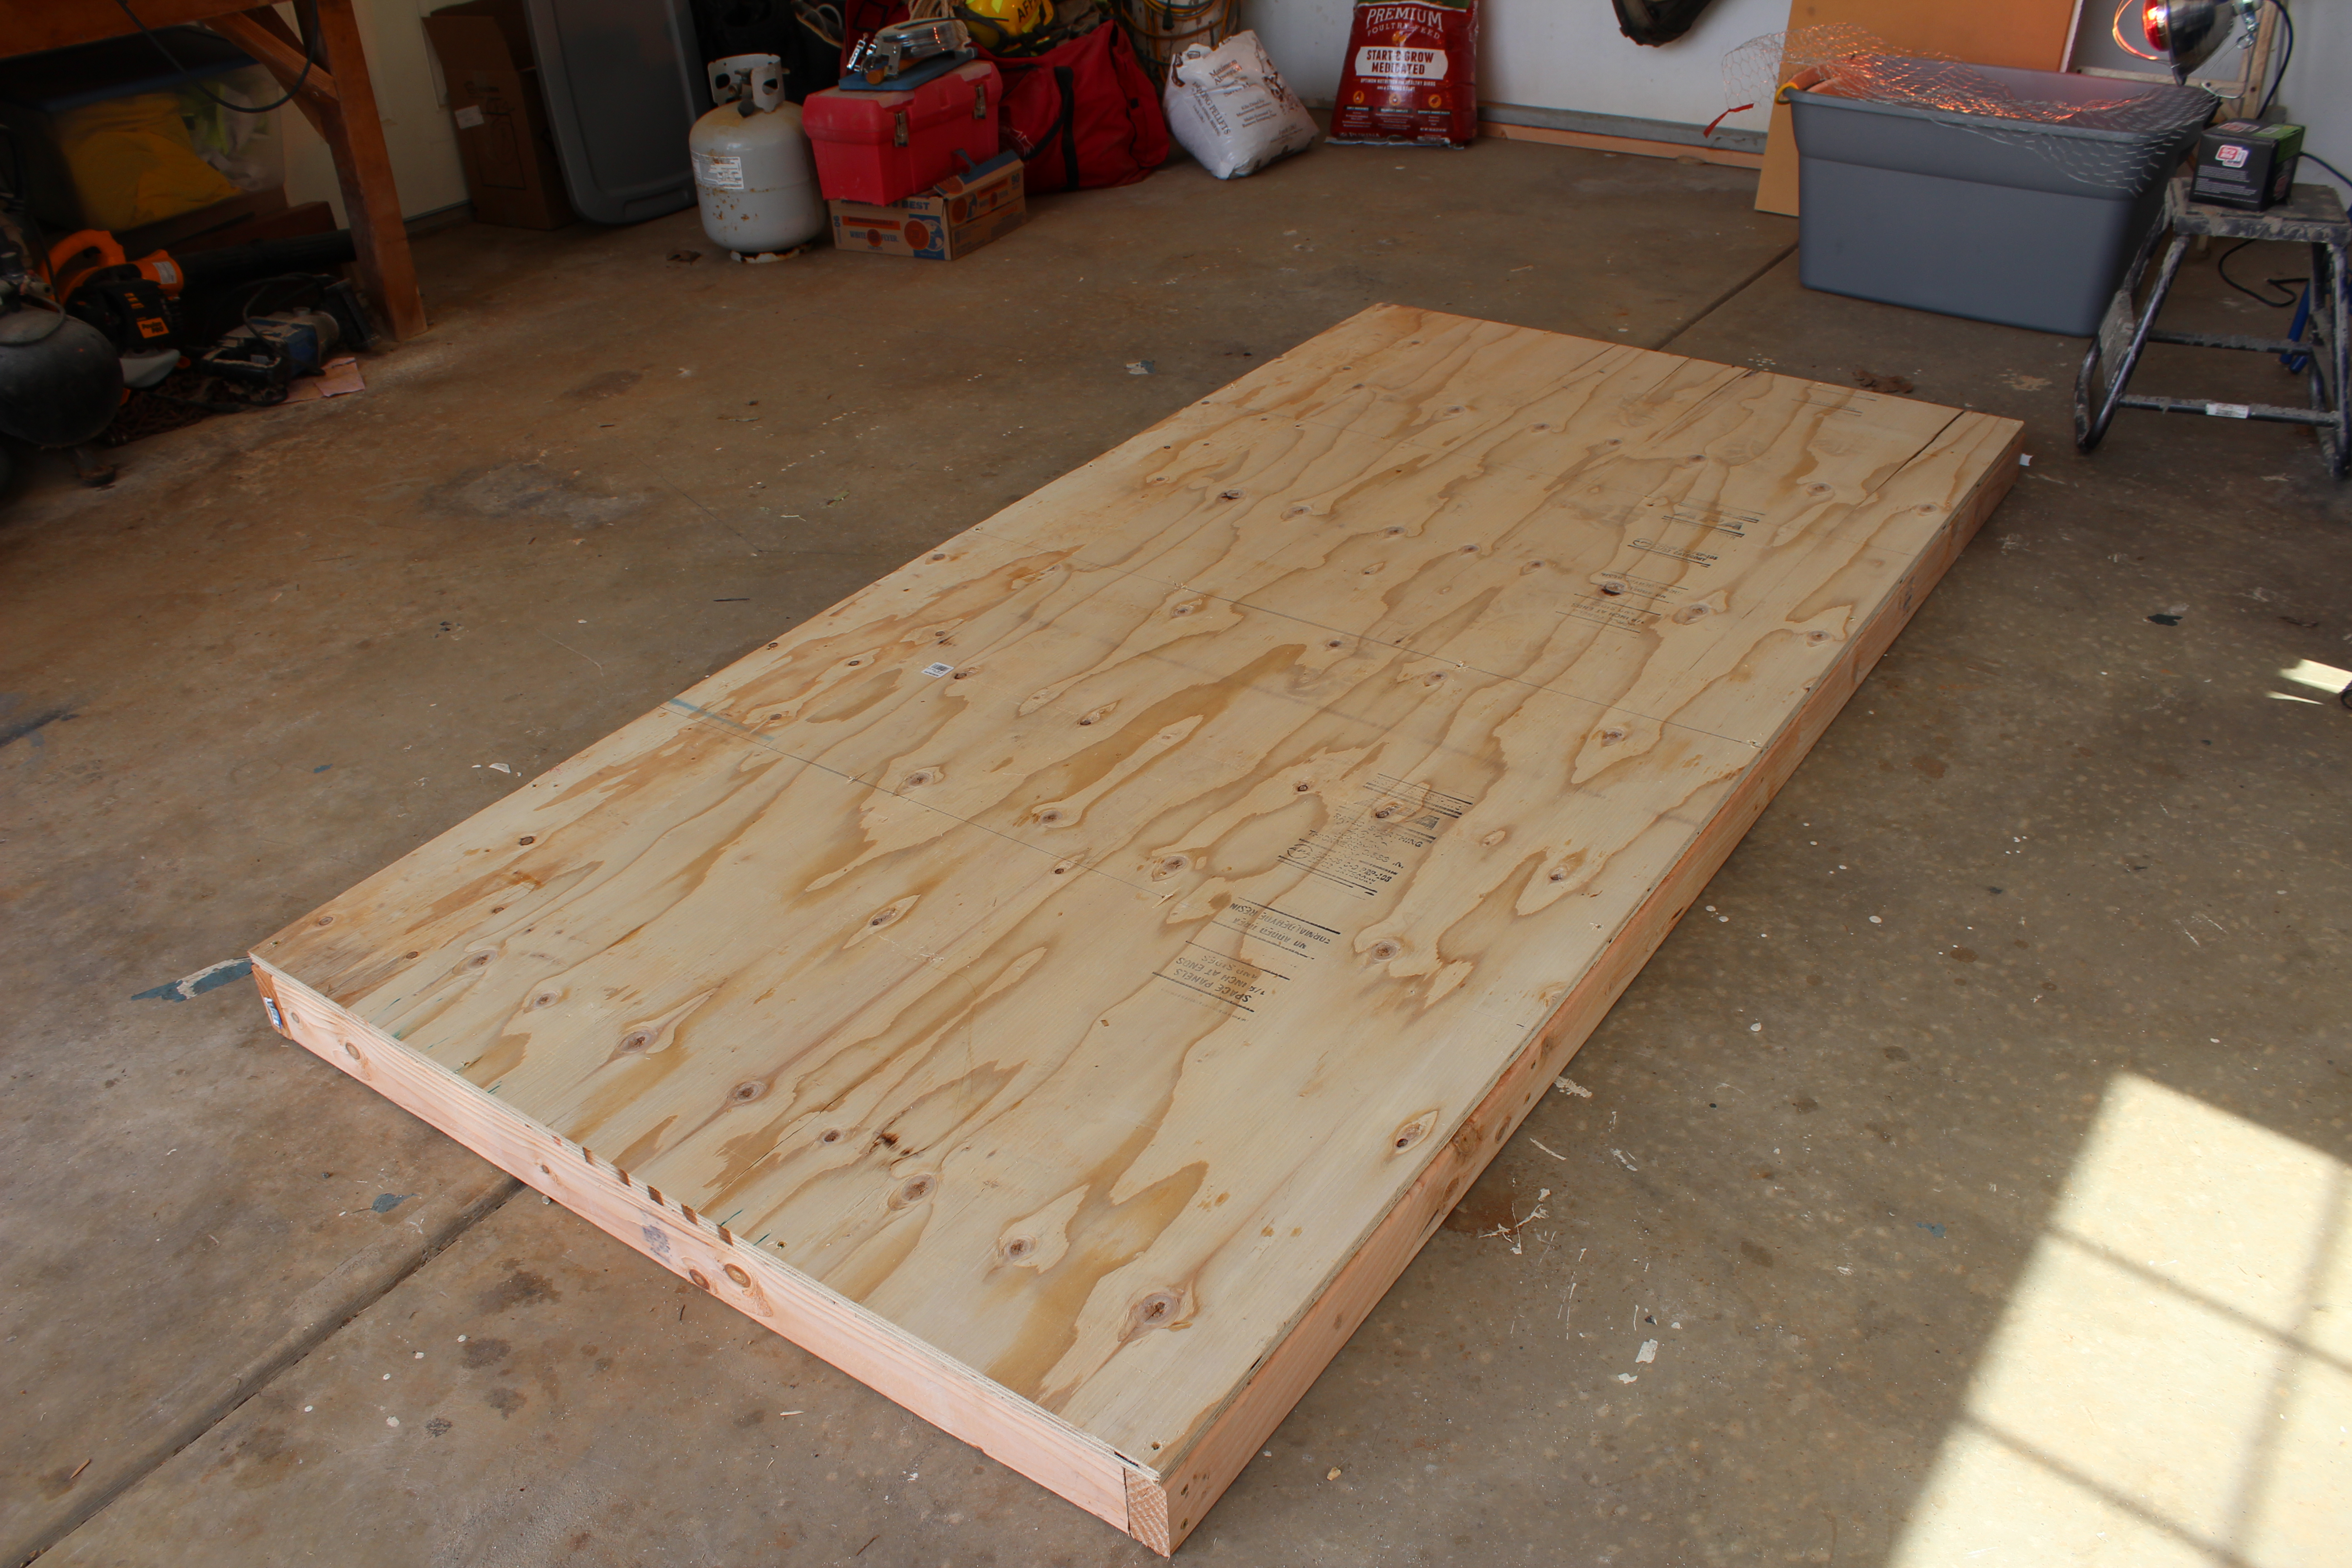
First, I cut and framed the wood for the floor… then covered it in 3/4 inch plywood.
The Floor
That was the easy part… then we drove it down to the orchard (where the coop will be) and started trying to figure out exactly how to get it seated on the piers… it took some digging, measuring, and leveling, but we eventually got it!
The Floor & Foundation
I know it doesn’t seem like much, but let me tell you, that was the hardest part of this whole project. It’s perfectly seated on the piers, is perfectly level, and is braced. That spaced underneath is intentional… it’s a place for the chickens to go to get shade or get out of the rain (if they want to be outside the coop). I am so happy!
Tomorrow… the walls!
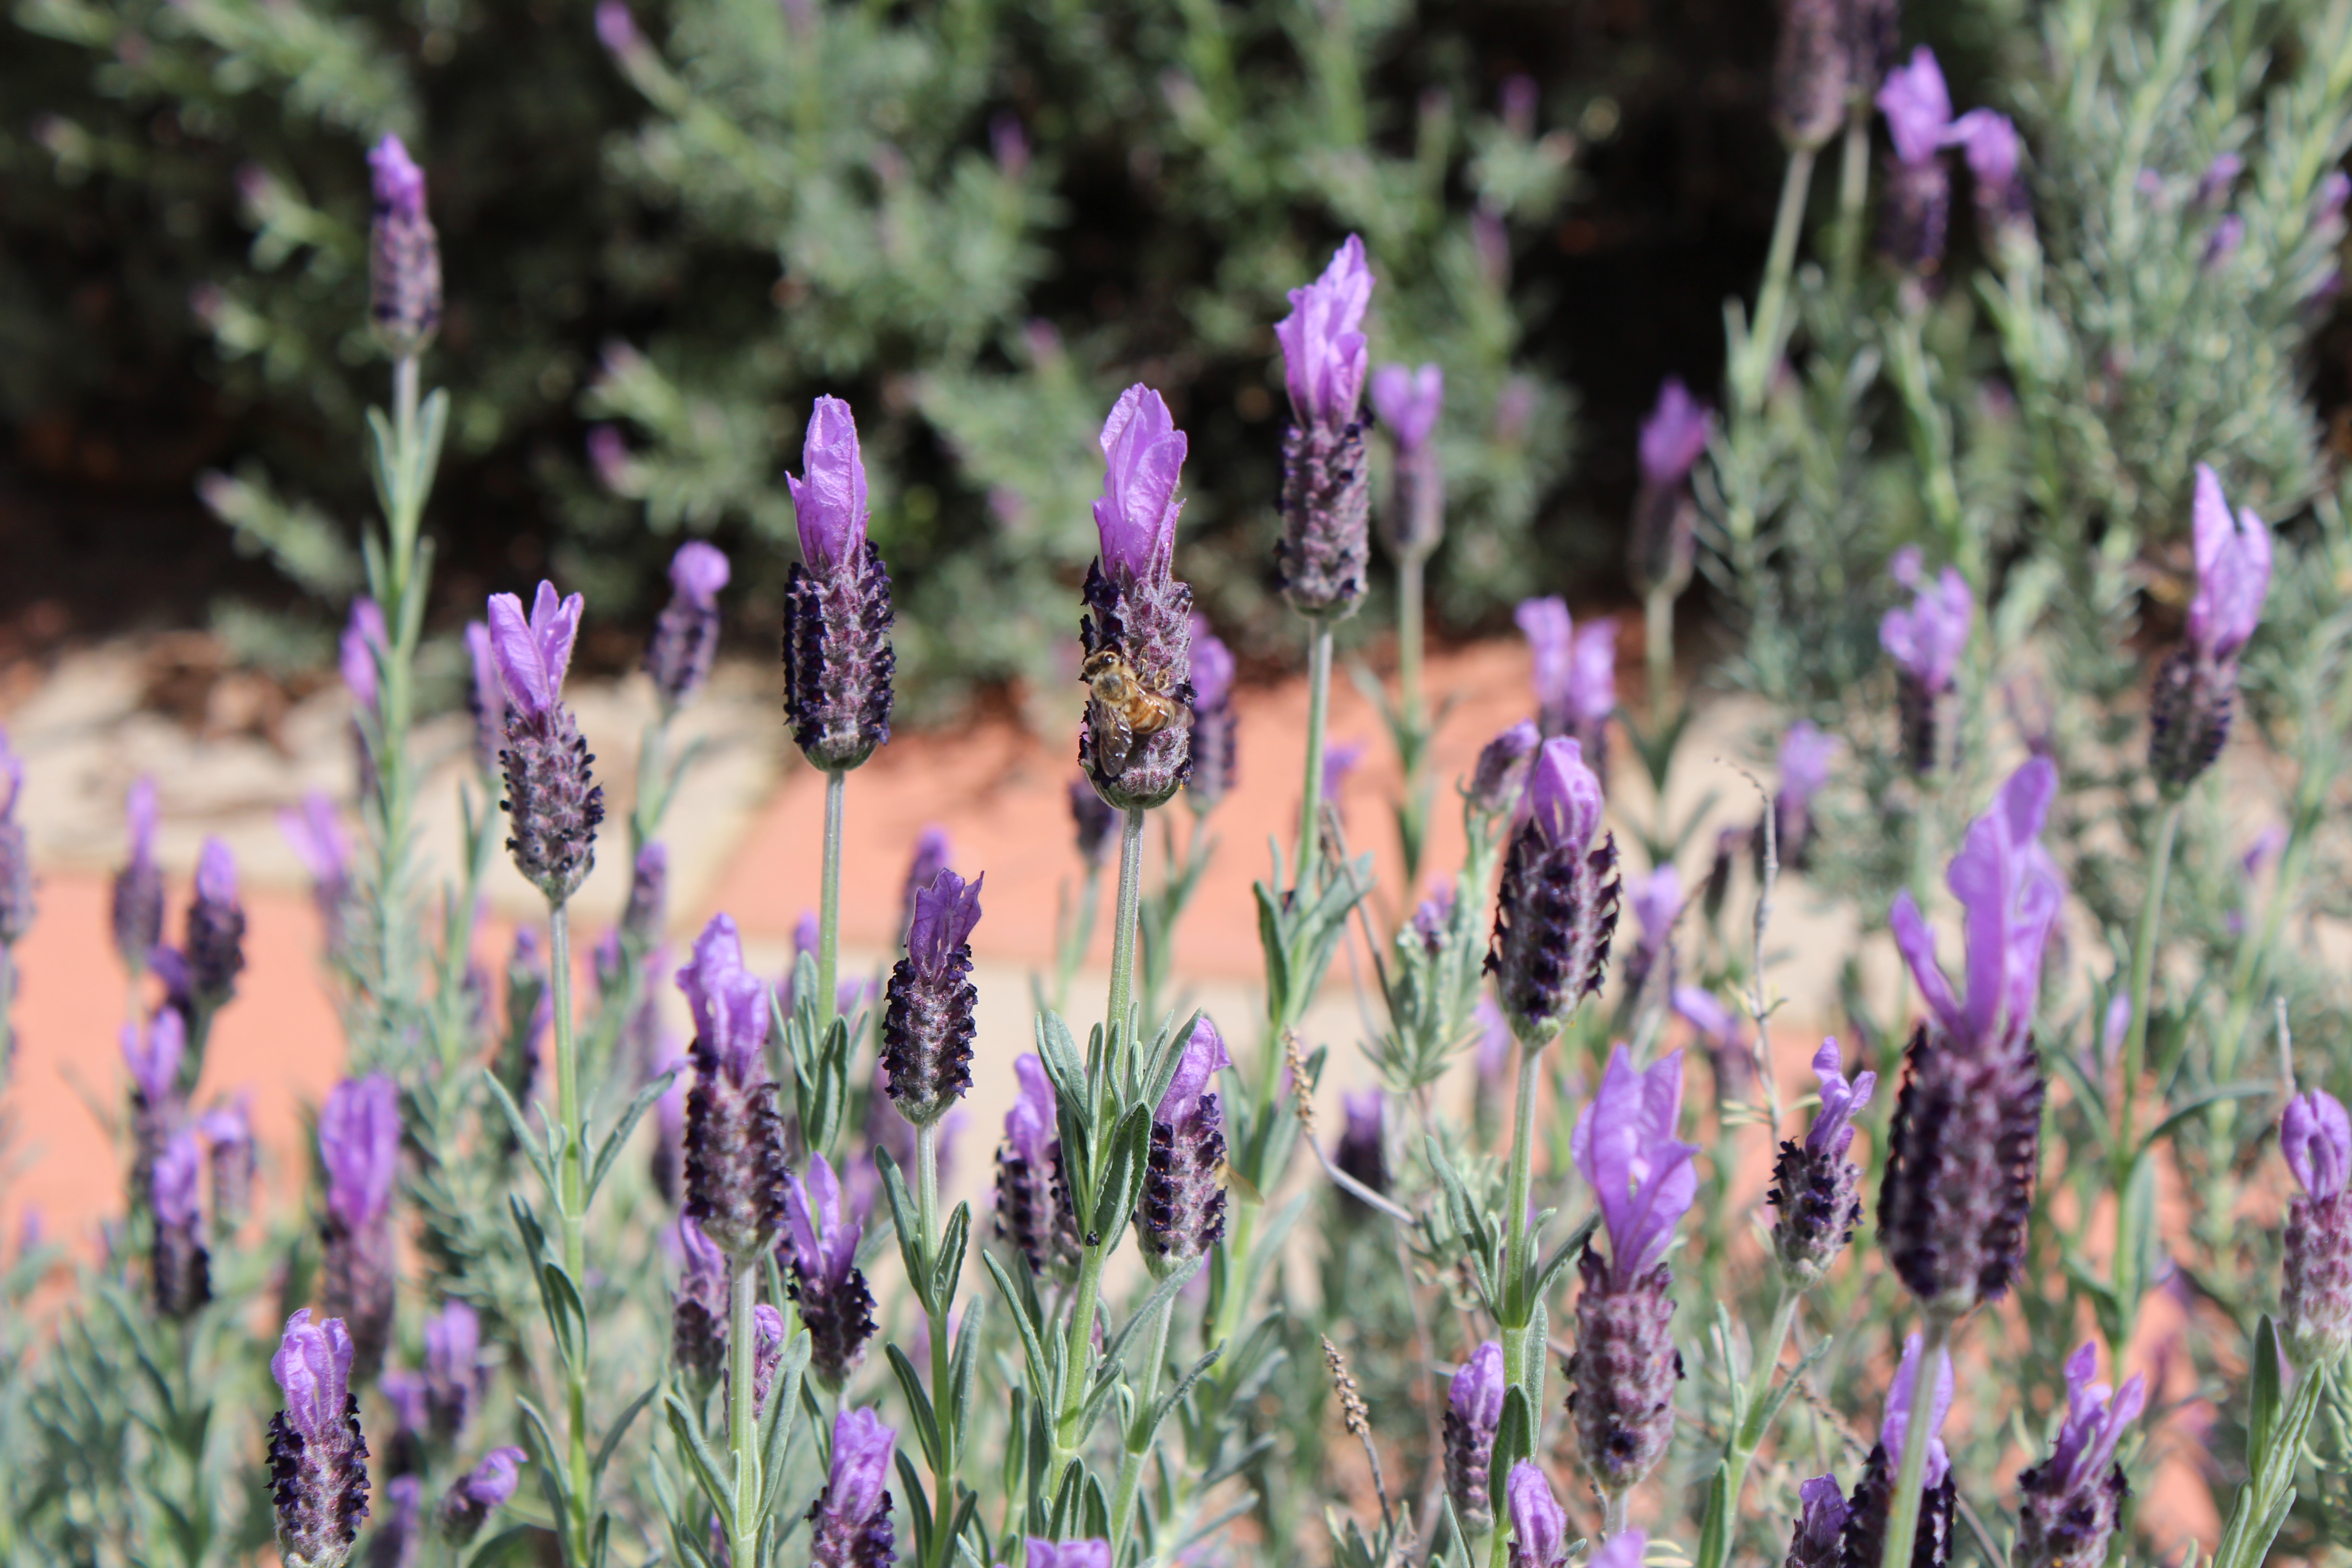
While we were moving things around, I noticed how amazing my lavender looks right now:
Lavender PathwayBusy Bee
I leave you with today’s chick pic… I have a chick who already likes to roost… she hopped right up on top of the feeder and settled in!